Born as a professional video converter, now be a powerful video toolbox.

“Its fast conversion time, high-quality output and extra features make it the perfect choice for video converter software.”
| Problem | Solution |
|--------|----------|
| No vibration | Run x360ce and the game as same admin level; disable Steam Input for the game. |
| Game crashes on launch | Delete xinput1_3.dll, try xinput1_4.dll or rename to xinput9_1_0.dll. |
| Controller not detected | Use C:\Windows\System32\ – copy x360ce there temporarily, but better to use game folder. |
| Double input (controller + keyboard) | Unhide “Hide x360ce controller” option in Settings → check “Hide virtual controller”. |
The x360ce vibmod 3140 new is a testament to PC gaming’s modding community—keeping legacy hardware alive against all odds. It transforms a dead, generic emulator into a precise force-feedback translator. By following this guide, you can revive the tactile thrill of crashing over a curb in Dirt 3 or feeling the torque steer in Shift 2 Unleashed.
Remember to always back up your original game files, test vibration in the configurator first, and share your working profiles with the community. Happy racing.
Do you have your own custom force feedback settings for the VibMod 3140 new? Share them in the comments below (or on your favorite simulation forum).
This guide covers how to set up x360ce vibmod 3.1.4.0, an older but reliable version of the Xbox 360 Controller Emulator specifically designed to add vibration (force feedback) support to generic PC gamepads.
Unlike the newer version of x360ce, which uses a virtual driver (GCA), this "vibmod" version is a "hook-based" library that sits directly in your game folder. 1. Preparation and Prerequisites
Before you start, ensure your PC sees your controller and that the drivers are installed.
Plug in your controller: Make sure Windows recognizes it in "Devices and Printers."
Install Dependencies: You generally need the DirectX End-User Runtimes and Visual C++ Redistributables for the emulator to function. 2. Installation Steps
Because version 3.1.4.0 is a library wrapper, it must be placed where the game "looks" for controllers.
Locate your game folder: Find the directory containing the main game executable (.exe).
Extract files: Copy the files from the x360ce_vibmod_3.1.4.0.zip (typically xinput1_3.dll, x360ce.ini, and x360ce.exe) into that same folder. Run the executable: Open x360ce.exe as an Administrator. 3. Configuration & Mapping x360ce vibmod 3140 new
When you first run the app, it will likely prompt you to create an .ini file or a .dll if they are missing.
Search for Settings: A popup may ask to search the internet for settings. This is the fastest way to map your specific generic controller.
Manual Mapping: If the internet search fails, use the dropdown menus for each button (Buttons 1-10, Stick axes) to match the layout of an Xbox 360 controller.
Vibration Tab: Since this is the "vibmod," go to the Force Feedback tab. Ensure "Enable Force Feedback" is checked. You can test the motors here to confirm they rumble. 4. Renaming the DLL (If Necessary)
Modern games might look for different versions of the XInput file. If the game doesn't recognize your controller, try renaming xinput1_3.dll to one of the following: xinput1_4.dll xinput1_2.dll xinput1_1.dll xinput9_1_0.dll 5. Launching the Game
Keep the app open (or close it if the game doesn't require the GUI running, though vibmod versions usually just need the DLL present).
Start the game: You should hear a short "beep" if the library successfully hooked into the game.
Check in-game: If the buttons are swapped, go back to the x360ce.exe tool and adjust the mapping.
Are you having trouble with a specific game or is the controller not vibrating during the test? x360ce Guide - Universal Split Screen
Bridging the Digital Divide: The Legacy of x360ce Vibmod 3.1.4.0 in PC Gaming Introduction
The landscape of PC gaming has historically been celebrated for its openness and versatility, yet this same freedom often brings complex compatibility challenges. One of the most prominent hurdles emerged during the late 2000s and early 2010s with the shift in how video games recognized gamepads. As Microsoft pushed the | Problem | Solution | |--------|----------| | No
API as the standard for its Xbox 360 controller, millions of players utilizing older or third-party gamepads built on the legacy DirectInput
API found themselves abruptly locked out of modern titles. In this era of digital frustration, community-driven software stepped in to bridge the gap. Among the most critical tools was the Xbox 360 Controller Emulator (x360ce) , specifically the branch known as vibmod 3.1.4.0
. This software did not simply map buttons; it preserved hardware usability, democratized gaming access, and served as a masterclass in community problem-solving. The Problem: The API Paradigm Shift To understand the value of x360ce vibmod
, one must understand the technical shift that necessitated it. For years, PC gamepads communicated via DirectInput, a flexible protocol that allowed for various button layouts and axes. However, with the massive success of the Xbox 360, Microsoft introduced XInput. XInput streamlined development by expecting a rigid, standardized controller layout (two thumbsticks, two analog triggers, and a specific button array).
While this made it easier for developers to optimize games for the Xbox 360 controller, it left legacy controllers, steering wheels, and arcade sticks speaking a language that newer games simply could not understand. Gamers were suddenly faced with a forced upgrade path: abandon their perfectly functional gamepads or lose the ability to play new releases. The Solution: Emulation and the "Vibmod"
The Xbox 360 Controller Emulator acted as a translator. By placing a custom, hooked dynamic-link library (specifically xinput1_3.dll
or similar variants) directly into a game's folder, x360ce tricked the game into believing that a connected DirectInput device was, in fact, an official Xbox 360 controller. The specific branch known as
(short for Vibration Modification) represented a highly sought-after breakthrough in this ecosystem. Early attempts at translation often struggled with haptic feedback. Vibration in gaming is not merely an aesthetic flourish; it provides critical physical cues for gameplay—registering a hit in a fighting game, feeling the loss of traction in a racing simulator, or experiencing the tension of a bowstring in an adventure game. The vibmod 3.1.4.0
build focused heavily on stabilizing and translating these force-feedback signals from XInput games back into the rumble motors of DirectInput gamepads. It allowed players to experience games exactly as the developers intended, without sacrificing physical immersion. Impact and Accessibility The legacy of tools like x360ce vibmod 3.1.4.0
extends far beyond technical trickery; it is deeply rooted in accessibility and consumer rights. Financial Accessibility:
Gaming is an expensive hobby. By enabling players to use generic or older controllers, x360ce saved countless users from having to buy brand-new hardware. Hardware Preservation: test vibration in the configurator first
It kept perfectly functioning electronics out of landfills, extending the lifecycle of computer peripherals by years. Specialized Hardware:
Many gamers use highly specialized, expensive fight sticks or accessibility controllers tailored to physical disabilities. Without an emulator like x360ce to translate those inputs into XInput, many of these users would have been entirely locked out of modern gaming libraries. The Evolution of the Tool vibmod 3.1.4.0
was a triumph of its era, software environments are never static. As PC gaming progressed, developers began implementing stricter anti-cheat engines that viewed custom, hooked
files in game directories as potential malicious hacks. This ultimately rendered the folder-based implementation of x360ce Version 3 obsolete for many multiplayer titles.
In response, the developers evolved x360ce into Version 4.x, moving away from local DLL hooking and toward system-level virtual driver emulation (utilizing drivers like ViGEmBus). Yet, for classic PC titles from the seventh and eighth generations of consoles, the lightweight, drag-and-drop nature of the era remains a legendary benchmark of efficiency. Conclusion The story of x360ce vibmod 3.1.4.0
is a testament to the ingenuity of the PC gaming community. When corporate shifts and hardware transitions threatened to leave a massive portion of the player base behind, open-source developers stepped up to create a seamless, free bridge. It proved that software could be used to combat forced obsolescence, ensuring that gaming remained an inclusive, accessible, and immersive experience for all. narrow the focus
of this essay to a specific game's compatibility or analyze how it compares to modern virtual gamepad drivers?
The "new" label isn't just marketing. Updated versions of the VibMod (often redistributed on GitHub, Discord, or simulation forums) include:
Fix: The game is using a different DLL name. Try copying and renaming the file to xinput9_1_0.dll, dinput8.dll, or xinput_1.dll. Also, disable Steam Input for that game (Properties → Controller → Disable Steam Input).
[Options]
UseInitBeep=1             ; 1 = Enable, 0 = Disable beep on initialization
Log=0                     ; 1 = Enable log file, 0 = Disable
Console=0                 ; 1 = Enable console window, 0 = Disable
ScanHardware=1            ; 1 = Enable hardware scan
ConfigFile=x360ce.ini     ; Configuration file name
Timeout=25                ; Device scan timeout in seconds
[InputHook]
HookCOM=1                 ; Hook COM ports
HookPIDVID=1              ; Hook PID/VID
HookWinTrust=0            ; Hook WinTrust
HookName=0                ; Hook Name
HookMode=1                ; Hook Mode
HookLL=0                  ; Hook Low Level
[Mappings]
PAD1=XInputPad1           ; Map PAD1 to XInput slot 1
PAD2=XInputPad2           ; Map PAD2 to XInput slot 2
PAD3=XInputPad3           ; Map PAD3 to XInput slot 3
PAD4=XInputPad4           ; Map PAD4 to XInput slot 4
[PAD1]
Index=0                   ; Controller index (0 = first controller detected)
Left Analog X=1           ; Axis index for Left Analog X
Left Analog Y=-2          ; Axis index for Left Analog Y (Inverted usually -2)
Right Analog X=3          ; Axis index for Right Analog X
Right Analog Y=-6         ; Axis index for Right Analog Y (Inverted usually -6)
Left Analog X Linear=0    ; Linear coefficient for Left Analog X
Left Analog Y Linear=0    ; Linear coefficient for Left Analog Y
Right Analog X Linear=0   ; Linear coefficient for Right Analog X
Right Analog Y Linear=0   ; Linear coefficient for Right Analog Y
Left Analog X DeadZone=0  ; Deadzone for Left Analog X
Left Analog Y DeadZone=0  ; Deadzone for Left Analog Y
Right Analog X DeadZone=0 ; Deadzone for Right Analog X
Right Analog Y DeadZone=0 ; Deadzone for Right Analog Y
Left Analog X AntiDeadZone=0 ; AntiDeadZone for Left Analog X
Left Analog Y AntiDeadZone=0 ; AntiDeadZone for Left Analog Y
Right Analog X AntiDeadZone=0 ; AntiDeadZone for Right Analog X
Right Analog Y AntiDeadZone=0 ; AntiDeadZone for Right Analog Y
Left Analog X AxisToButton=0  ; Convert axis to button
Left Analog Y AxisToButton=0  ; Convert axis to button
Right Analog X AxisToButton=0 ; Convert axis to button
Right Analog Y AxisToButton=0 ; Convert axis to button
D-pad POV=1               ; POV index for D-pad
D-pad Up=POV1UP           ; D-pad Up mapping
D-pad Down=POV1DOWN       ; D-pad Down mapping
D-pad Left=POV1LEFT       ; D-pad Left mapping
D-pad Right=POV1RIGHT     ; D-pad Right mapping
A=1                       ; Button mapping (A)
B=2                       ; Button mapping (B)
X=3                       ; Button mapping (X)
Y=4                       ; Button mapping (Y)
Left Shoulder=5           ; Button mapping (LB)
Right Shoulder=6          ; Button mapping (RB)
Back=7                    ; Button mapping (Back/Select)
Start=8                   ; Button mapping (Start)
Left Thumb=9              ; Button mapping (Left Stick Click)
Right Thumb=10            ; Button mapping (Right Stick Click)
TriggerLeft=4             ; Axis for Left Trigger (often Axis 4 or Z)
TriggerRight=2            ; Axis for Right Trigger (often Axis 2 or Rz)
TriggerDeadzone=5         ; Deadzone for triggers
Left Motor=0              ; Vibration motor strength (0=auto)
Right Motor=0             ; Vibration motor strength (0=auto)
Right Motor Period=0      ; Vibration period
Force Enable=1            ; Enable force feedback
Force Type=0              ; Force feedback type
Swap Motor=0              ; Swap weak/strong motors
Parent=PAD1               ; Parent device mapping
PassThrough=0             ; PassThrough mode
[PAD2]
Index=-1                  ; -1 = Disabled
; (Settings for PAD2 would go here if enabled)
[PAD3]
Index=-1                  ; -1 = Disabled
[PAD4]
Index=-1                  ; -1 = Disabled
Fix: Download and install "Microsoft Visual C++ Redistributable 2015-2022" (both x86 and x64). Delete x360ce.ini and let the tool regenerate it.
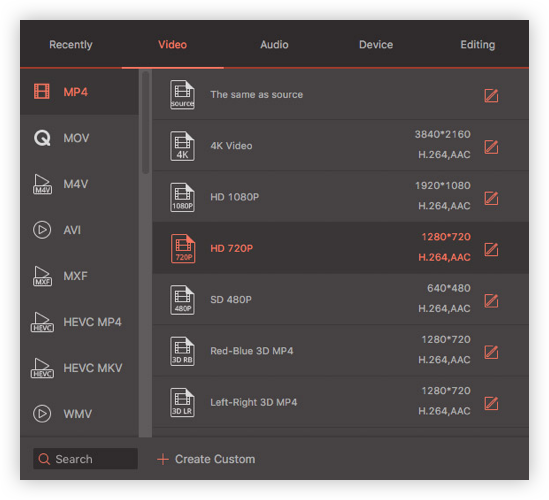
To ensure the best video output quality with different resolutions, Video Converter Ultimate provides you with some excellent configuration options for each output format by default. After thousands of internal professional tests, all of the parameter combinations have the optimal balance among encoder, resolution, bitrate, frame rate, video codec, audio codec, etc.
Additionally, you can create a customized format with special parameters by youself if needed.
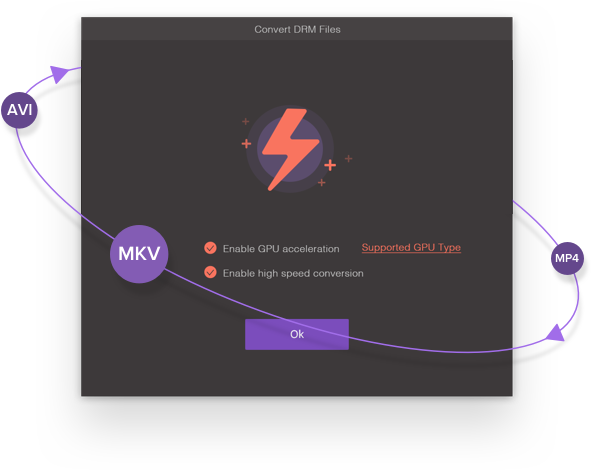
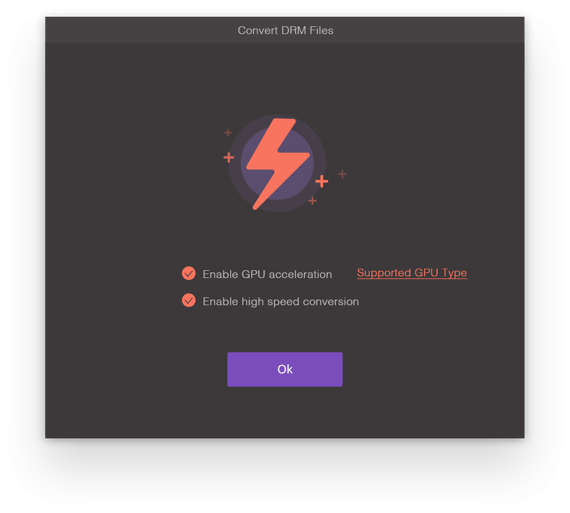
Powered by the exclusive and industry-leading APEXTRANS technology, it converts videos with zero quality loss or video compression.

Do you want to find and convert your videos from different sources easily?
Wondershare Video Converter Ultimate enables you to instantly find all your videos for quick conversion from:

As the all-in-one video solution, Wondershare Video Converter Ultiamte enables you to edit Video, DVD Burner (Include Blu-ray burner),
Screen Capture, Fix Video Metadata, Cast Video to TV, Video Downloader, Create photos to GIF and much more.
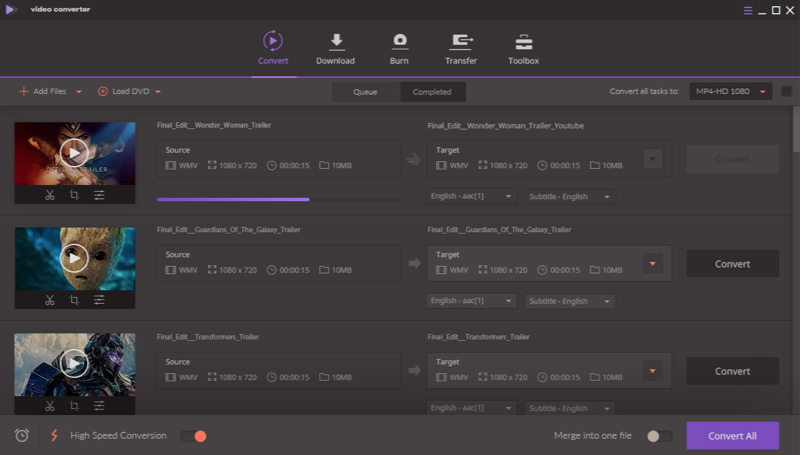 Step 1: Import videos from the device to the software
 Step 2: If you need, you can edit your video
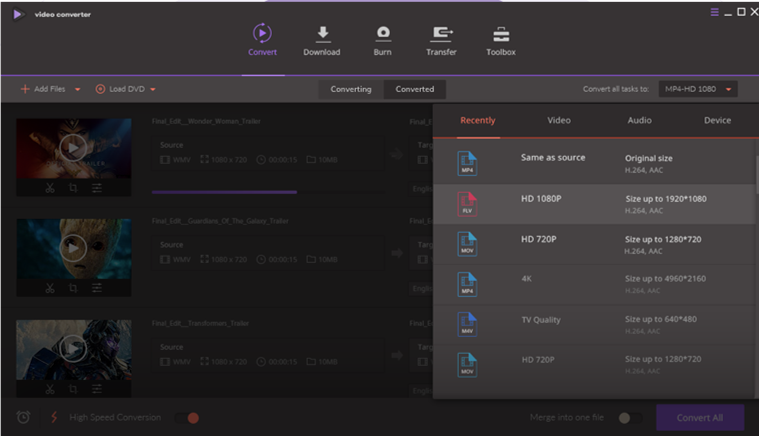 Step 3: Select the output format and adjust the output parameters
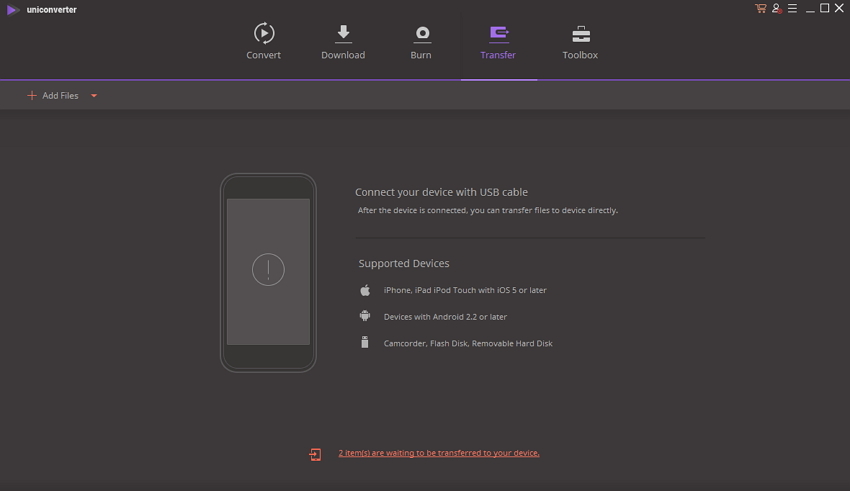 Step 4: When the video is converted, you can transfer it to the device
Converting and Editing Video and
Audio Files Have Never Been So Easy!
